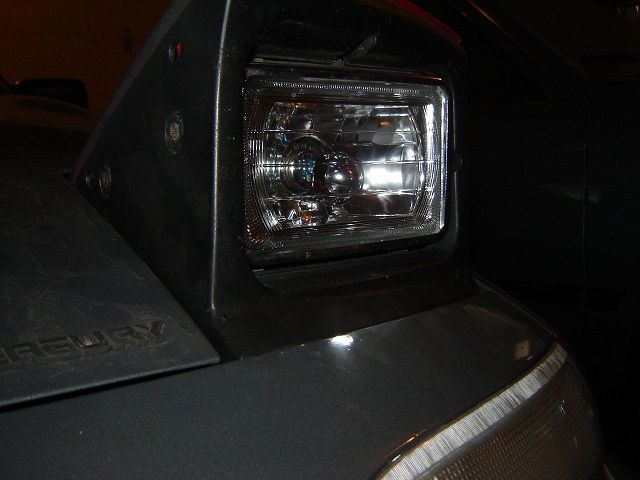
One of my main complaints with the Capri has always been the headlights. I love popup headlights, but the stock sealed beam halogens are craptastic at best in my opinion. Heres a pic of the stock halogen headlamp.
The beam pattern is ok, but they are really dim. I really wish my phone's camera had the ability to disable the auto shutter speed so the pictures would all have the same exposure level, but if it did you wouldn't see as much in this pic. This pic was pretty hard to get a decent clear and sharp pic due to the shutter speed going so slow (3-4 seconds).
Over the years I have upgraded my headlight a couple of times. The first time was way back when I first bought the car back in 2000. I got a diamond euro H4 kit off ebay with some terrible blue coated bulbs.
I really do like the way they looked
..that is until you turned them on and saw how dim and narrow the beamed was. Thankfully I only paid $40 for them.
In 2007, both bulbs low beam elements went out and eventually one of the high beams finally died too. I literally drove with just my high beams on and I rarely ever got flashed
which just goes to show how dim they were.
At this point, plug and play H4 Hid kits finally cost less than a $100. So I decided to upgrade the $hitty blue tinted bulbs to some nice and bright 4K Hids.
I really like the pure white light, unfortunately the beam was still narrow and the amount of glare they produced to oncoming traffic caused me to get flashed constantly. Looking at the pic above, there is a lot of glaring bright light above the hotspot. The glare is worse then what the picture shows due to the camera auto shutte speed adjusting brightness levels. I never realized how bad it was to other drivers until my wife said she was completely blinded by them one night when I drove past her.
The second issue I noticed was when I was driving down the freeway and cars next to me with regular old halogen reflector headlights would still throw a beam farther than my hids did.
After 6 years the passenger side ballast failed (water got inside and shorted it out). With a little luck, the local store had a clearance sale on the old 4x6 halogens for just $2 a lamp. So I bought one and put it in the passenger side while I still had the blinding hid in the drivers side. It looked so ghetto for the remaining two summer months I drove in 2013
LOL
In the spring of 2014, I decided I needed to do a proper headlight conversion before I put the car back on the road again. I no longer wanted to be that a$$hole with the blinding lights or suffer with dim unsafe headlights that I can outrun a 80mph.
So my search began and finally ended when I found these.
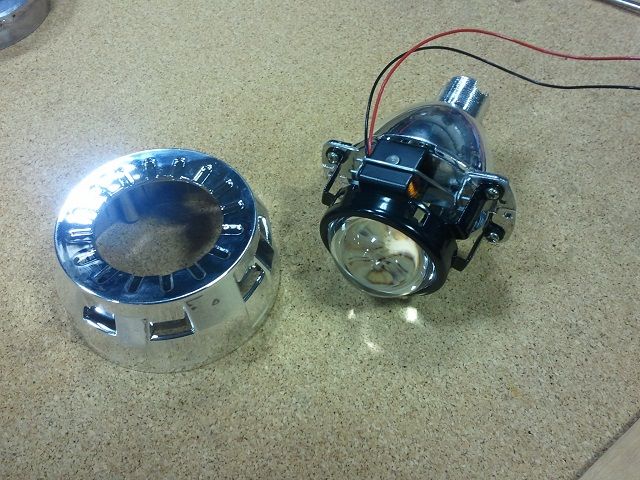
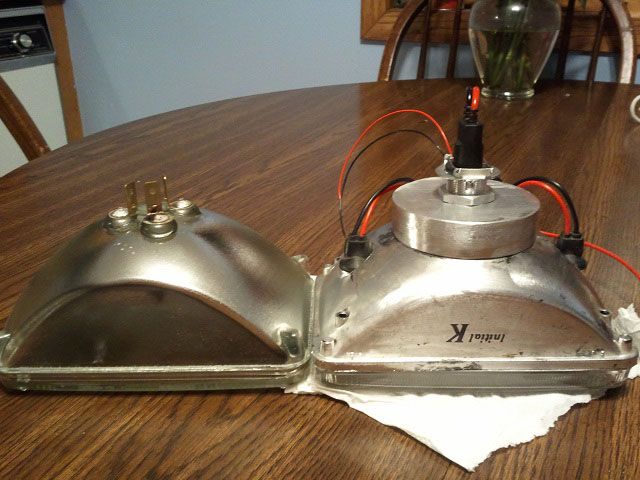
The Morimoto Micro H1 Bi-xenon projector, its one of the smallest projectors that I could find. The lens is 46mm (1.8) wide and the total length of only 102mm (4). Now I just had to find a way to mount them.
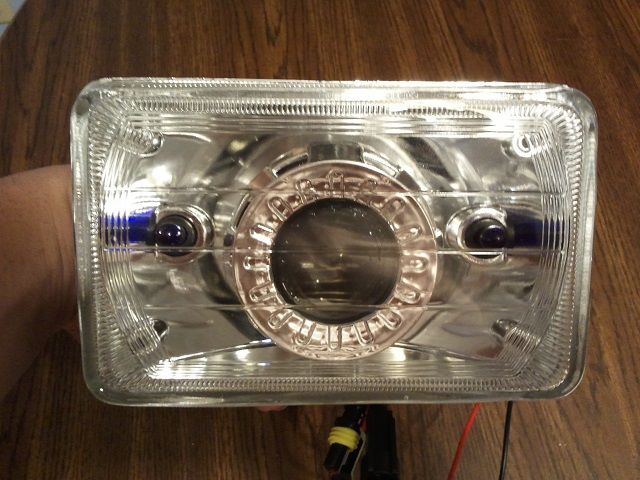
I decided the best way to proceed with this project was to sacrifice my ebay diamond euros.
Taking them apart was pretty easy. First I put them in the oven for 6 mins @ 225 degrees, then I was able to pull the front glass off with just an oven mit and the internal reflector/bulb holder was held to the back with 4 screws.
The next step was to find a way to securely mount them inside the conversion lamp housings. After some time of rummaging through some scrape steel and aluminum that was lying around. I found a piece of 3 inch aluminum pipe that snugly fit over the back side of lamp housing where the rubber boot seal use to go. I then cut some sheet aluminum into small squares and drilled two holes into it.
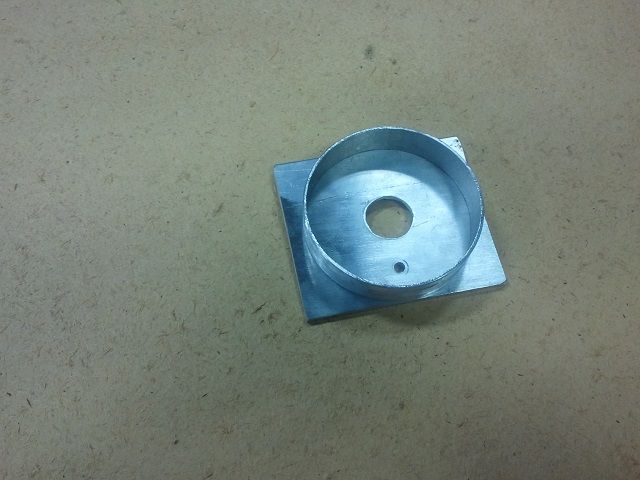
If my memory serves me right, the large hole is 13/16 to fit the mounting shaft of the projector and the smaller hole is ¼ for the grommet where the high beam shutter wires run out of it. I welded the two pieces together and ground it down to form a cap for the back of my H4 housings. Then it was just a matter of pressing the cap onto the housing, threading the projectors mounting shaft through the cap, and rebaking the front lens back on.
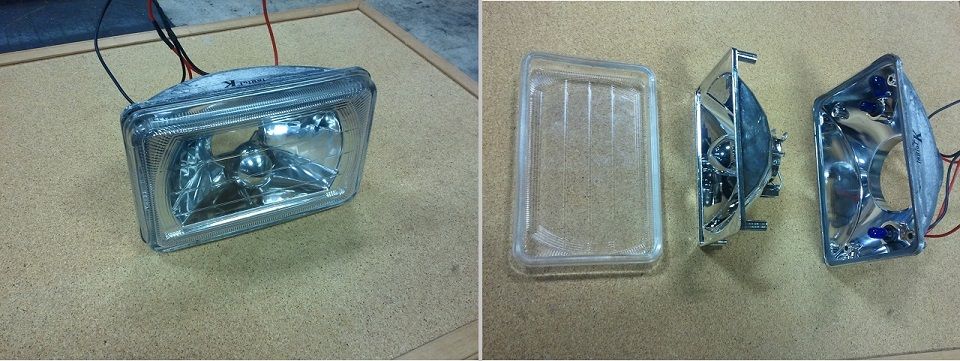
Fully assembled and ready to be installed.
Heres a pic of it sitting next to a sealed 4x6.
I was initially a little worried that it might not fit when I compared the length of the old vs new light. My worries were laid to rest when I was able to install and fully adjust them just fine.
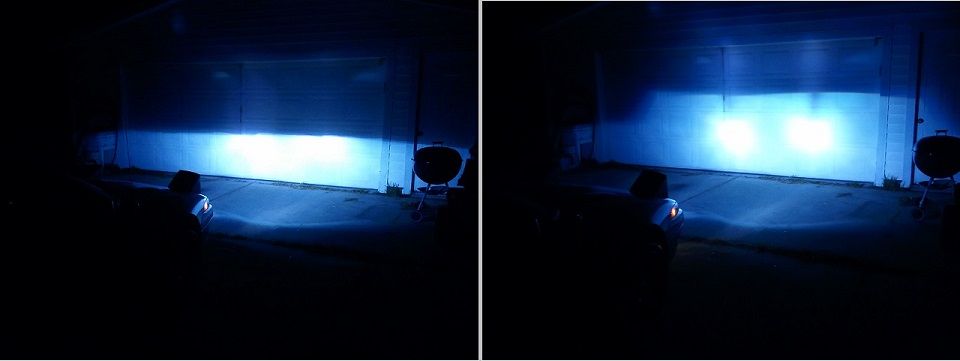
So now its time to see how the new projector compared to the sealed beam lamp when you're on the road.
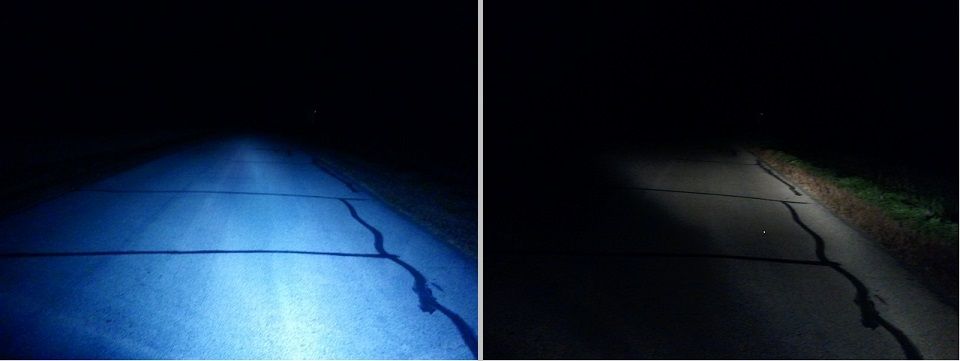
The pic on the left is the micro H1 with a 6K bulb installed on the driver side. The right pic is the sealed beam in the passenger side.
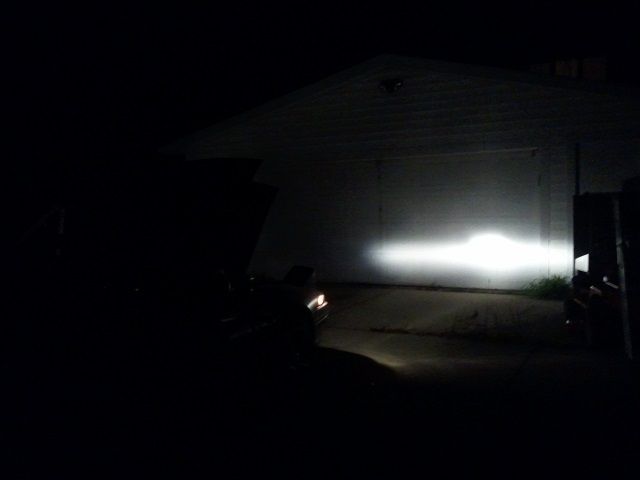
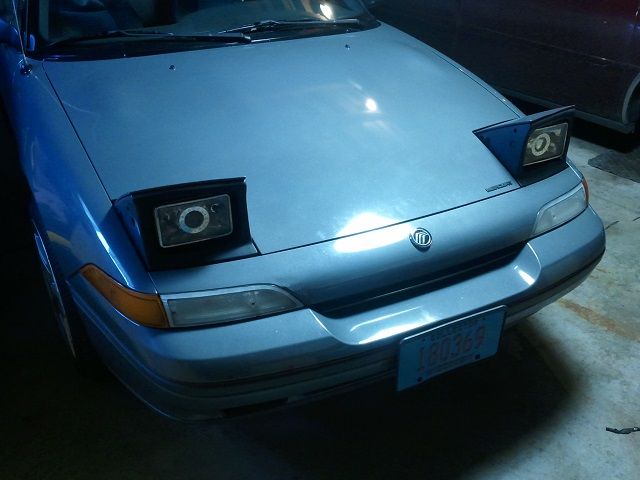
Heres a pic of my car with both of them installed.
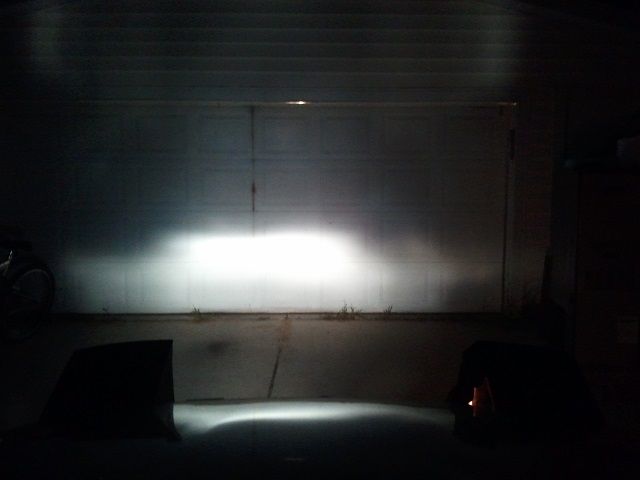
And of course, one last pic to show my current low and high beams against the garage door.